目录
1.GAN是什么?
2.GAN的计算
3.编写GAN的小小示例
4.GAN的发展与应用
5.AI作画体验-Disco Diffusion
1.GAN是什么?
2014年,因为朋友邀请协助一个计算机生成图像的项目,lanGooddellow发明了GAN(Generative adversarial network),被广泛用于图像生成!
GAN翻译过来,就是生成对抗网络了,它确实“人”如其名,正是一个生成对抗的过程。
生成器(Generator):生成数据,企图骗过判别器
判别器(Discriminator):判断数据,企图揪出生成器生成的假数据
让我们看一看这个生成对抗的过程吧,以图像为例(毕竟GAN大部分是为了生成图像嘛)
一开始,生成器随机生成噪声数据,和真图一起输入判别器

然后判别器开始训练,训练后判别器能轻易判别噪声和真图
于是我们又开始训练生成器,让生成出来的图片与真实更接近,等到这时的判别器无法分辨真假,只能瞎蒙(50%真50%假),我们便继续训练判别器
循环上述过程,形成一种对抗,生成器和判别器的性能都逐渐提升,最终得到很强的生成器和判别器

我们就可以用这个很强的生成器来生成图片啦!
2.GAN的计算
GAN的损失函数定义:

G:生成器
D:判别器
一切损失计算都是在D输出处产生的,而D的输出是true/fake,所以整体采用二分类的交叉熵损失函数
Ex~pdata表示从真实数据分布p中采样得到样本x
Ez~pz表示从特定数据分布p中采样得到样本z
G(z):生成器生成z
D(x):判别器判断真实数据,判断正确的概率
D(G(z)):判别器判断生成器生成的数据,判断正确的概率
判别器D训练阶段:
左边一项越大,意味着D(x)越大,判别器准确判断真实样本为true,有maxD
右边一项越大,意味着D(G(z))越小,判别器准确判断生成样本为fake,有maxD
生成器G训练阶段:
不管左边一项
右边一项越小,意味着D(G(z))越大,生成器生成的数据越逼真,有minG
训练判别器时最大化这个函数,训练生成器时最小化这个函数,形成对抗
3.编写GAN的小小示例
经典的MNIST手写数字数据集,简单好训练
tensorflow版本:2.10.0 keras版本:2.10.0
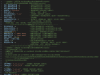
- import keras
- import tensorflow as tf
- from keras import layers
- from keras.datasets import mnist
- import matplotlib.pyplot as plt
- import numpy as np
- import glob
- # 显存自适应分配(分配尽可能充足的GPU)
- gpus = tf.config.experimental.list_physical_devices(device_type='GPU')
- for gpu in gpus:
- tf.config.experimental.set_memory_growth(gpu,True)
-
- # 判断是否使用gpu进行训练
- gpu_ok = tf.test.is_gpu_available()
- print("tf version:", tf.__version__)
- print("use GPU", gpu_ok)
- # 手写数据集
- (train_images,train_labels),(test_images,test_labels) = mnist.load_data()
- train_images = (train_images)/255 # 归一化
- BATCH_SIZE = 256
- BUFFER_SIZE = 60000
- datasets = tf.data.Dataset.from_tensor_slices(train_images) # 创建数据集
- datasets = datasets.shuffle(BUFFER_SIZE).batch(BATCH_SIZE) # 乱序
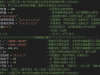
- # 生成器模型
- def generator_model():
- model = keras.Sequential()
- model.add(layers.Dense(256,input_shape=(100,),use_bias=False))
- model.add(layers.BatchNormalization())
- model.add(layers.LeakyReLU())
-
- model.add(layers.Dense(512,use_bias=False))
- model.add(layers.BatchNormalization())
- model.add(layers.LeakyReLU())
-
- model.add(layers.Dense(28*28*1,use_bias=False,activation="tanh")) # 输出28*28*1形状 使用tanh激活得到-1 到1 的值
- model.add(layers.BatchNormalization())
-
- model.add(layers.Reshape((28,28,1))) # reshape成28*28*1的形状
- return model
- # 判别器模型
- def discriminator_model():
- model = keras.Sequential()
- model.add(layers.Flatten())
-
- model.add(layers.Dense(512,use_bias=False))
- model.add(layers.BatchNormalization())
- model.add(layers.LeakyReLU())
-
- model.add(layers.Dense(256,use_bias=False))
- model.add(layers.BatchNormalization())
- model.add(layers.LeakyReLU())
-
- model.add(layers.Dense(1))
- return model
- # loss
- cross_entropy = tf.keras.losses.BinaryCrossentropy(from_logits=True) # 相当于normalize(softmax)该层
- # 辨别器loss
- def discriminator_loss(real_out,fake_out):
- real_loss = cross_entropy(tf.ones_like(real_out),real_out) # 使用binary_crossentropy 对真实图片判别为1
- fake_loss = cross_entropy(tf.zeros_like(fake_out),fake_out) # 生成的图片 判别为0
- return real_loss + fake_loss
- # 生成器loss
- def generator_loss(fake_out):
- return cross_entropy(tf.ones_like(fake_out),fake_out) # 希望对生成的图片返回为1
- # 定义训练参数
- generator_opt = tf.keras.optimizers.Adam(1e-4)
- discriminator_opt = tf.keras.optimizers.Adam(1e-4)
- EPOCHS = 100
- noise_dim = 100
- num_exp_to_generate = 16
- seed = tf.random.normal([num_exp_to_generate,noise_dim]) # (16,100) # 生成16个样本,长度为100的随机数
- generator = generator_model()
- discriminator = discriminator_model()
- # 一个epoch
- def train_step(images):
- noise = tf.random.normal([BATCH_SIZE,noise_dim])
-
- with tf.GradientTape() as gen_tape,tf.GradientTape() as disc_tape: # 梯度
- real_out = discriminator(images,training=True)
-
- gen_image = generator(noise,training=True)
-
- fake_out = discriminator(gen_image,training=True)
-
- gen_loss = generator_loss(fake_out) # 最大化生成图片预测为真的概率
- disc_loss = discriminator_loss(real_out,fake_out) # 最小化生成图片预测为真的概率
-
- gradient_gen = gen_tape.gradient(gen_loss,generator.trainable_variables) # 计算梯度
- gradient_disc = disc_tape.gradient(disc_loss,discriminator.trainable_variables)
- generator_opt.apply_gradients(zip(gradient_gen,generator.trainable_variables)) # 更新变量
- discriminator_opt.apply_gradients(zip(gradient_disc,discriminator.trainable_variables))
- # 绘制函数
- def genrate_plot_image(gan_model,test_noise):
- pre_images = gan_model(test_noise,training=False)
- fig = plt.figure(figsize=(4,4))
- for i in range(pre_images.shape[0]):
- plt.subplot(4,4,i+1) # 四行四列
- plt.imshow((pre_images[i,:,:,0]+1)/2,cmap="gray")
- plt.axis("off")
- plt.show()
- # 定义训练
- def train(dataset,epochs):
- for epoch in range(epochs):
- for image_batch in dataset:
- train_step(image_batch)
- print(".",end="")
- genrate_plot_image(generator,seed)
- # 开始训练模型
- train(datasets,EPOCHS)

GAN的训练对算力要求较高,而且在训练更复杂的问题时不稳定,容易遇到梯度消失,模式崩溃的问题,训练难度较高
4.GAN的发展与应用
2014年诞生以来,GAN的发展非常迅速,最初的GAN难以生成高质量的图像,而现在的GAN已经可以生成高质量的图像
2015年,结合了CNN的DCGAN

2016年,变换图像的CycleGAN和pix2pix


2018年,逐步增长网络的proGAN和基于此的StyleGAN

此外,GAN还可以进行图像数据集生成,人脸生成,视频预测,图文转换,照片融合,超分辨率等
然而就在最近,图像生成领域出现了颠覆性的方法-Diffusion Model,将图像生成效果提升到一个新的高度,风头甚至开始超过GAN!,让我们通过AI作画感受一下这个新方法的强大
想了解原理可以看这个: 由浅入深了解Diffusion Model - 知乎 (zhihu.com)
5.AI作画体验-Disco Diffusion
今年(2022),谷歌基于CLIP-Guided Diffusion创建了一个开源的强大AI图像生成程序-Disco Diffusion,可以根据描述生成精致的图片,一起体验一下吧!
在这里打开(需要梯子)GoogleColab Disco Diffusion

运行全部代码,将使用Google免费提供的大GPU,连接到Google Drive以保存生成的图像
在这里输入描述指导生成图片,改第一行(一个双引号语句即可),不要改第二行
创建好描述后开始生成图片!

如输入描述"In the morning,overlooking TOKYO city by greg rutkowski and thomas kinkade,Trending on artstationmakoto shinkai style"
输入描述"city of the future "

当然,即使是相同的描述,每次生成的结果也会不一样,生成的图片自动保存在谷歌云盘
更多可以看看下面的链接
参数解释:AI画家–Disco Diffusion使用指南+本地化保姆级教程_sugarsama的博客-CSDN博客
参考描述:Disco Diffusion Prompt 描述语参考 - 哔哩哔哩 (bilibili.com)
来源:https://blog.csdn.net/skycol/article/details/127187577
免责声明:如果侵犯了您的权益,请联系站长,我们会及时删除侵权内容,谢谢合作! |