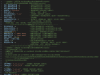
根本情况承接Stable Diffusion v1, 详情请见我的博文【文生图系列】 Stable Diffusion v1复现教程。然后更新pytorch和torchvision的版本,由于要利用GPU和xformers,必要下载gpu版本的pytorch。再下载open-clip-torch库文件,安装命令如下所示:
conda install pytorch == 1.12.1 torchvision == 0.13.1 torchaudio0.12.1 cudatoolkit=11.3 -c pytorch
pip install open-clip-torch2.7.0
pip install -e .
在pytorch官网上探求下载命令,pytorch为1.12.1时,有cuda 10.2, 11.3 和11.6的版本,我选择了cuda为11.3版本,那么对应的cudatoolkit=11.3,pytorch安装命令如上所示。
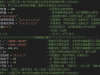
xformers
xformers可以或许有用地利用GPU,未安装xformers,我的GPU内存为15多G,会出现CUDA out of memory的错误,利用xformer,运行scripts/txt2img.py时,GPU内存占用最高为13多G。
官方文档中是cuda-11.4,由于我的pytorch的cuda是11.3,按照官方教程安装xformers,会出现xFormers wasn’t build with CUDA support cuda错误。以是将cuda的版本更改为11.3。
export CUDA_HOME=/usr/local/cuda-11.3
conda install -c nvidia/label/cuda-11.3.0 cuda-nvcc
conda install -c conda-forge gcc
conda install -c conda-forge gxx_linux-64==9.5.0
下载并安装xformers,在pip install -e .时,会泯灭较长时间。
cd …
git clone https://github.com/facebookresearch/xformers.git
cd xformers
git submodule update --init --recursive
pip install -r requirements.txt
pip install -e .
cd …/stablediffusion
bug 记载
- Torch not compiled with CUDA,必要下载带有cuda版本的pytorch
- xFormers wasn’t build with CUDA support cuda版本不匹配,就如上述所述,将cuda版本由11.4更改为11.3,然后重新安装xformers
txt2img
下载stable-diffusion-2-1 模子,下载链接如下所示。stable-diffusion-2-1 是在stable-diffusion-2模子上微调得到的。数据未变,设置punsafe=0.1额外练习了55k步,然后调整punsafe=0.98后再额外练习155k步。
v2-1_768-ema-pruned.ckpt下载: https://huggingface.co/stabilityai/stable-diffusion-2-1/resolve/main/v2-1_768-ema-pruned.ckpt
sd v2版本和sd v1版本的超参数险些一样,这里不再赘述,具体见【文生图系列】 Stable Diffusion v1复现教程。sd v2相比于v1支持更高分辨,能天生更高清的图片。
python scripts/txt2img.py --prompt “a professional photograph of an astronaut riding a horse” --ckpt v2-1_768-ema-pruned.ckpt --config configs/stable-diffusion/v2-inference-v.yaml --H 768 --W 768 --device cuda
宇航员骑马的天生图片如下所示,相比于v1,天生的图片更全面,也更有质感。马天生的不错,不够露脸的宇航员有些可怕。
 ps: 原图近乎9M,CSDN最高上传5M的图片,将图片举行了压缩到了3M。 ps: 原图近乎9M,CSDN最高上传5M的图片,将图片举行了压缩到了3M。
租赁的服务器,明天就要到期了。设置完情况之后,趁着最后的时间极速测试一下。下图是天生的一张白发帅哥,超等帅气,很像贝克汉姆。
python scripts/txt2img.py --prompt “a best-quality photo of an extremely handsome young man with white hair who is muscle” --ckpt v2-1_768-ema-pruned.ckpt --config configs/stable-diffusion/v2-inference-v.yaml --H 768 --W 768 --device cuda

python scripts/txt2img.py --prompt “a best-quality photo of a classical Chinese Tang Dynasty beauty who is drinking tea” --ckpt v2-1_768-ema-pruned.ckpt --config configs/stable-diffusion/v2-inference-v.yaml --H 768 --W 768 --device cuda
和sd v1相比,相同的提示词,“唐朝玉人品茗的提示词”,sd v2能把品茗这个动作画出来,但是服饰不怎么像唐朝。

原图近乎9M,CSDN最高上传5M的图片,将图片举行了压缩到了3M。
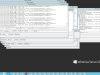
diffusers
利用diffusers库可以或许更简单更有服从地运行sd 2。
Cannot initialize model with low cpu memory usage because accelerate was not found in the environment. Defaulting to low_cpu_mem_usage=False. It is strongly recommended to install accelerate for faster and less memory-intense model loading. You can do so with:
pip install accelerate safetensors
- import torch
- from diffusers import StableDiffusionPipeline, DPMSolverMultistepScheduler
- model_id = "stabilityai/stable-diffusion-2-1"
- # Use the DPMSolverMultistepScheduler (DPM-Solver++) scheduler here instead
- pipe = StableDiffusionPipeline.from_pretrained(model_id, torch_dtype=torch.float16)
- pipe.enable_attention_slicing()#如果出现CUDA out of memory.加这行代码
- pipe.scheduler = DPMSolverMultistepScheduler.from_config(pipe.scheduler.config)
- pipe = pipe.to("cuda")
- prompt = "a photo of an astronaut riding a horse on mars"
- image = pipe(prompt).images[0]
-
- image.save("astronaut_rides_horse.png")

参考
- Stability-AI/stablediffusion
- stabilityai/stable-diffusion-2-1
来源:https://blog.csdn.net/weixin_42111770/article/details/131073172
免责声明:如果侵犯了您的权益,请联系站长,我们会及时删除侵权内容,谢谢合作! |