前言
为了使用开放权重的LLM(大语言模型),基于自己的训练集,微调模型,会涉及到如下一些技术要点:
- 配置运行环境
- 下载、加载基础模型
- 收集语料、微调训练
- 检验训练效果
在实施过程中,遇到不少困难,因此写下这篇文档,做为记录。
环境配置
1. 模型加载 - icetk报错
(1) 问题描述
在huggingface的模型库中,大模型会被分散为多个bin文件,在加载这些原始模型时,有些模型(如Chat-GLM)需要安装icetk。
这里遇到了第一个问题,使用pip安装icetk和torch两个包后,使用from_pretrained加载模型时会报缺少icetk的情况。
但实际情况是这个包已经安装了。
查资料的过程中,有人说出现该错误的原因是icetk依赖cpu版torch2.0,需要先装icetk再装GPU版torch。但我在服务器上尝试该方案后,并不成功。
之后在github上看到一条相同的issue,下方的回答中提到的方法,成功解决了我的问题。
(2) 解决方案
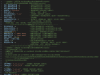
- 启动python环境,执行import icetk会报错,并指向lzma.py中的引用错误
- 根据错误提示,定位到lzma.py文件及相关代码的位置
- 按如下方式修改源代码
修改前
- from _lzma import *
- from _lzma import _encode_filter_properties, _decode_filter_properties
- try:
- from _lzma import *
- from _lzma import _encode_filter_properties, _decode_filter_properties
- except ImportError:
- from backports.lzma import *
- from backports.lzma import _encode_filter_properties, _decode_filter_properties
(1) 问题描述
截止到目前(2023-04-06),Meta官方仍未对LLaMa模型开源,网上流传的为泄露版。因此,正式版transformers没有该模型的Model或Tokenizer库。
在查找资料的过程中,有人说使用pip install git+某版本transformer安装dev版transformers。
但由于当我使用该指令安装时,这里指定的分支已经被删除了,所以无法安装成功。
(2) 解决方案
因为无法通过pip install的方式安装,所以这里考虑用编译源码的方式安装。
- git clone https://github.com/huggingface/transformers.git
- pip install -e .
届时,直接使用pip install transformers即可。
微调训练
1. 并行计算 - bitsandbytes报错
(1) 问题描述
安装bitsandbytes,可以在加载模型时,设置load_in_8bit=True, device_map='auto'降低显存,并将模型分布到GPU上计算。
但在引用时会出现警告: UserWarning: The installed version of bitsandbytes was compiled without GPU support.。
并在模型加载时会报有关"libsbitsandbytes_cpu.so"的编译错误。
(2) 解决方案
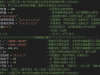
- 使用pip install bitsandbytes正常安装库
- 切换到bitsandbytes所在lib目录,例如: xxx/venv/lib/python3.9/site-packages/bitsandbytes/cuda_setup
- 使用vim指令或其他方式编辑main.py文件
- 定位到if not torch.cuda.is_available(): return 'libsbitsandbytes_cpu.so', None, None, None, None,将其替换为if torch.cuda.is_available(): return 'libbitsandbytes_cuda116.so', None, None, None, None 。(并非一定要使用cuda116,只需大于等于自身显卡cuda版本即可)
- 定位到self.lib = ct.cdll.LoadLibrary(binary_path),会找到两处,把两处都替换为self.lib = ct.cdll.LoadLibrary(str(binary_path))
可能是因为Nvidia针对浮点型计算进行过优化,使用load_in_8bit=True让参数以整型进行计算,反而会降低计算速度。
因此,在显存足够时,建议不使用该设置。
2. 模型微调 - 使用PEFT
Lora技术提出之后,huggingface提供了PEFT框架支持,可通过pip install peft安装。
使用时分为如下步骤:
- 参数设置 - 配置Lora参数,通过get_peft_model方法加载模型。
- 模型训练 - 此时只会微调模型的部分参数、而其他参数不变。
- 模型保存 - 使用model.save_pretrained("output_dir")方法保存模型。
- 模型加载 - 读取保存peft模型及相关配置,使用PeftModel.from_pretrained(model, peft_model_id)方法加载模型。
(1) 模型训练、保存
- from transformers import AutoModel
- from peft import get_peft_model, LoraConfig
- # Lora参数设置
- peft_config = LoraConfig(
- r=lora_r,
- lora_alpha=lora_alpha,
- target_modules=lora_target_modules,
- lora_dropout=lora_dropout,
- bias="none",
- task_type="CAUSAL_LM",
- )
- # 模型加载
- model = AutoModel.from_pretrained("model_name_or_path")
- model = get_peft_model(model, peft_config)
- # output: trainable params: 4194304 || all params: 6742609920 || trainable%: 0.06220594176090199
- model.print_trainable_parameters()
- # 模型训练
- ...
- # 模型保存
- model.save_pretrained("output_dir")
以下是官方给出的样例,但是按该方式加载模型,在计算时会出现AttributeError: 'NoneType' object has no attribute 'device'报错。
- from transformers import AutoModel, AutoTokenizer
- from peft import PeftModel, PeftConfig
- # 加载peft配置
- peft_model_id = "output_dir"
- peft_config = PeftConfig.from_pretrained(peft_model_id)
- # 加载tokenizer
- tokenizer = AutoTokenizer.from_pretrained(peft_config.base_model_name_or_path)
- # 结合基础模型和微调结果,加载模型
- model = AutoModel.from_pretrained(peft_config.base_model_name_or_path)
- model = PeftModel.from_pretrained(model, peft_model_id)
- model = model.to(device)
- model.eval()
- # 模型计算
- ...
根据使用环境是单GPU或多GPU,分别按以下两种方式使用,即可解决上述问题。
解决方案 - 单GPU
- # 加载基础模型
- base_model = AutoModel.from_pretrained(
- model_path,
- load_in_8bit=True,
- torch_dtype=torch.float16,
- # device_map="{'': 0}"
- device_map="auto"
- )
- peft_model = PeftModel.from_pretrained(
- base_model,
- peft_model_id,
- torch_dtype=torch.float16,
- # device_map="{'': 0}"
- device_map="auto"
- )
- # 加载基础模型
- base_model = AutoModel.from_pretrained(
- model_path,
- load_in_8bit=True,
- torch_dtype=torch.float16,
- device_map="auto"
- )
- # 获取模型参数分配表
- device_map = {f"base_model.model.{k}": v for k, v in model.hf_device_map.items()}
- # 按相同的参数分配加载peft model
- peft_model = PeftModel.from_pretrained(
- base_model,
- peft_model_id,
- device_map=device_map,
- torch_dtype=torch.float16
- )
应该是因为自动分配参数时,无法保证peft_model和base_model的分配方法一致。
因此,在多GPU环境下,需通过device_map绑定二者参数的分配方式。
吐槽
在查资料的过程中,建议大家多用谷歌、少用百度。
上述这几个问题,都在github对应仓库的issue里有人提出过,我也都是从下方的答复中找到的解决方案。
但是在用百度和谷歌搜报时,百度却从没给出github上的回答。
百度谷歌  参考文档 参考文档
icetk报错 - https://github.com/THUDM/ChatGLM-6B/issues/323
bitsandbytes报错 - https://github.com/oobabooga/text-generation-webui/issues/147#issuecomment-1456040134
peft使用说明 - https://huggingface.co/blog/peft
peft加载模型 - https://github.com/tloen/alpaca-lora/issues/77
来源:https://blog.csdn.net/anycall201/article/details/129959567
免责声明:如果侵犯了您的权益,请联系站长,我们会及时删除侵权内容,谢谢合作! |